
There can’t be many folks who don’t love the smell of a newly baked loaf as it comes out of the oven and the comforting warmth and yumminess of eating fresh bread. It’s been a staple of our diet for thousands of years, so there can’t be any excuses for not baking great bread over our campfire. Here, David, explains how we can make a delicious loaf of freshly baked bread, from making a good hot fire, using a variety of baking methods, through to a few proven recipes to try!
Bread basics
Bread falls into two main categories, leavened and unleavened. All this means is one, the leavened bread, has a rising agent such as yeast, baking powder or another similar chemical agent, whereas the other, unleavened doesn’t! The sliced bread in a supermarket and those bread rolls, you probably make a bacon sandwich with, will most likely be a leavened bread. The rising agent puts air into the bread creating a lighter structure, with varying levels of softness. An unleavened bread, is flat and dense, such as tortilla, flatbread, or the naan you might eat with a curry or wrap around food stuffs.
So leavened bread is generally thick with an airy structure, how much will depend on the method used, whereas unleavened bread is thin, because it would be just too chewy and difficult to eat if it wasn’t! Leavened bread is typically baked in some form of oven, but other options include a damper or stick-bread. Unleavened bread is usually cooked against the source of the heat, in a large pan or even directly on or within the fire.
The Campfire
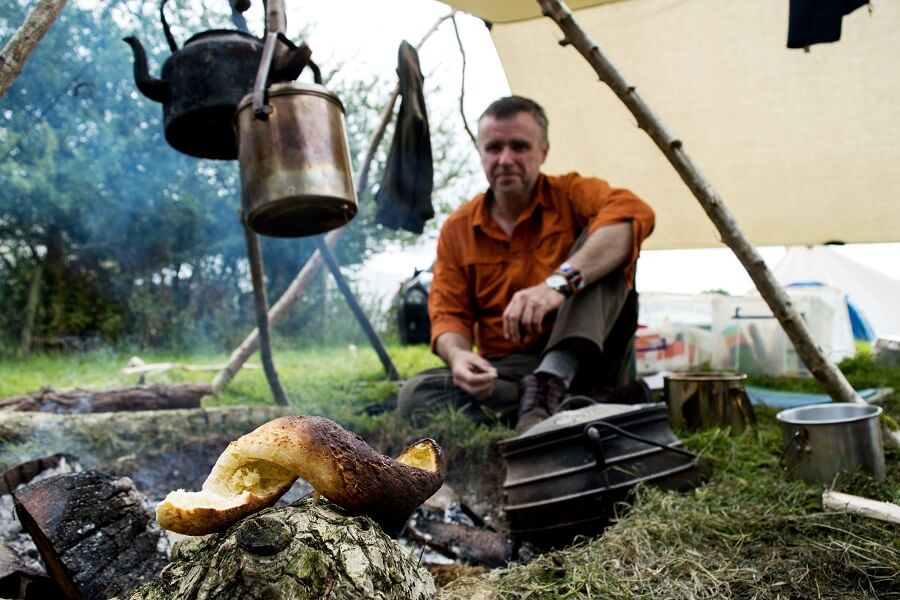
How you light your campfire is up to you – but what you will want is a hot fire that generates a good deal of heat and for long enough to bake your bread. To get sufficient heat, approximately 200°C, you will most likely need hardwood, oak or ash will be good, and this is best left in the round rather than split. If split thinly it will burn more quickly and may not generate enough heat for your baking.
As with campfire cooking, it is beneficial to build a fire with an area for cooking at one end, with the other end used to generate more embers to be dragged over and used when your cooking area cools.
To judge when the fire is hot enough, use the back of your hand to feel the temperature. To get an idea of what 200°C feels like, when using a conventional oven at home, turn it up to this temperature and place your hand in the oven for a moment or two, obviously do this carefully! I count how many seconds it takes for it to become uncomfortable and then remove my hand. Depending on how used to having your hands near a fire, this may be just a couple of seconds. Using the back of your hand is preferable, because, if you do accidently burn your hand you can still use your hand. If you burn the inside of your hand or finger tips, finishing your baking will be much harder to do!
Ovens, pots, and pans
Except for baking bread directly in the embers or on a stick, you are going to need a pot to bake your bread. Options include a Dutch oven or some combination of pots and pans to improvise an oven.
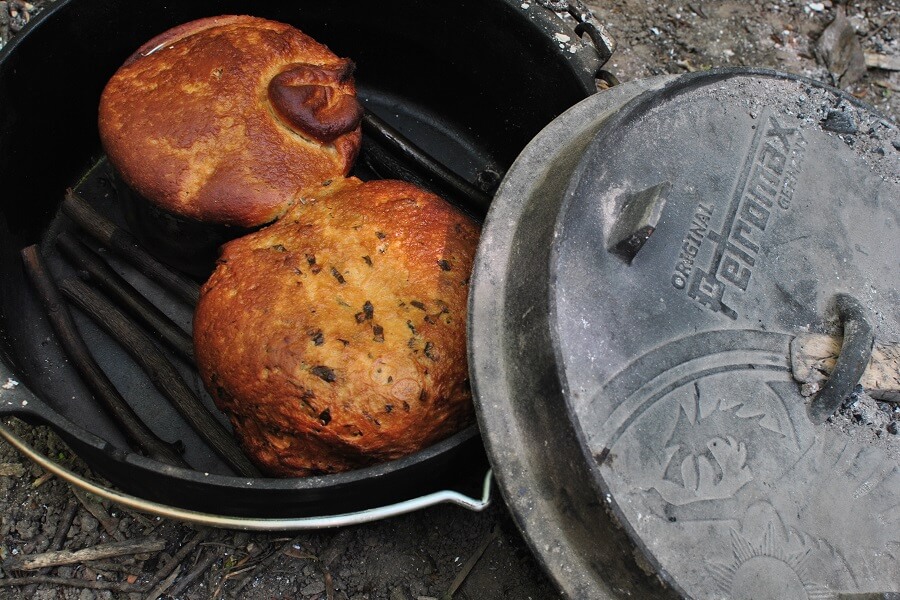
The benefit of a Dutch oven, it being made of cast iron, is that it is good at distributing heat evenly around the pot. But, if you place a Dutch oven directly over flames, the bottom will still get hotter than the sides and will likely burn what you are cooking inside!
To avoid this when baking with a Dutch oven, you can cook your bread in another pot inside the Dutch oven. This creates an oven, like you would find in a kitchen. Items cooked in an oven are usually cooked in the middle of the oven, supported on a rack. In the Dutch oven the pot containing the dough is best supported by small pieces of green stick or stones. This will raise the loaf tin of the bottom of the oven, allow the heat to circulate and deliver an evenly distributed bake.
Rather than suspending the Dutch oven over the fire, you can place it directly in the fire. To do this, I recommend raking the embers back and placing the pot into the area with few if any embers. This avoid the worry of a burnt bottom (see above).
Whichever approach you use, I find it’s best to check the loaf midway through the bake. When it is looking like a loaf of bread, all be it with a pale crust, place hot coals on the lid to finish the bake.
The Dutch oven is a very useful item in a fixed, semi-permanent camp or perhaps on a canoeing journey, but if hiking its weight would be far too much to carry.

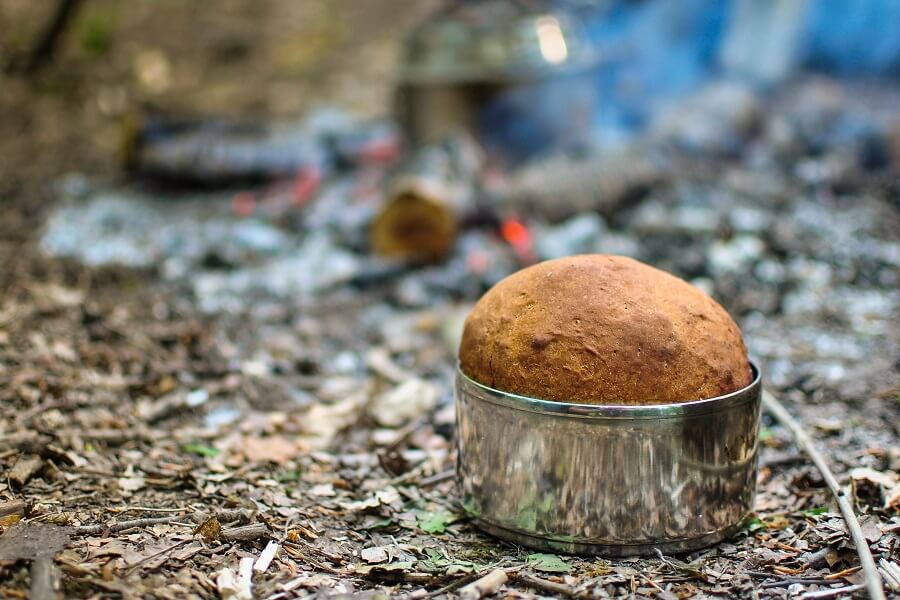
An alternative, and much lighter option is to carry two pots or billy cans, one sitting inside the other as the Dutch oven above. Lightweight aluminium pots are good, but you may find they tend to deform easily with the heat of the fire. My preference is for stainless steel pots, the popular Zebra brand being very robust.
When using aluminium or stainless steel pots, I rake the embers of the fire back and place the pots into the middle of the fire and then cover as per using a Dutch oven. Note if using the Zebra billy cans, the lid, when inverted and place back of the pot will accept the embers needed to brown the top of the loaf.
And what about some improvisation – once you have tried these methods, it’s good to experiment a little. For instance, the stainless-steel mug I usual have with me for a brew, can be used as a baking pot with another larger pot, inverted and placed over the top to form an oven. This works very well, although obviously only produces a small loaf – but sufficient bread for one person, that’s for sure!
Recipes
Here are some of the bread recipes I regularly bake over a campfire: a traditional loaf with yeast, a bannock recipe and one for flatbread, all with alternative baking suggestions.
Recipe – Traditional loaf
This recipe produces a lovely small loaf with a nice dome. I cook this loaf in a Dutch oven or an improvised oven; a stainless billy can with another smaller billy inside, and a tier from a Zebra stainless tiffin food carrier or similar.
- Measure out 1 mug of good quality, strong bread baking flour (350ml mug) and ½ teaspoon of salt and put in a mixing bowl (or something that will do the job), ideally warm the bowl first.
- Activate the yeast, I use Allinson dried active yeast; Add 1 teaspoon of sugar, a pinch of flour and 1 teaspoon of dried active yeast to a ⅓ of a mug of warm / hot water, mix well and leave to activate – bubble and froth for a few minutes. I find the best way to judge the temperature is to carefully put a finger in the water, it should feel hot, but not so much as you need to remove your finger – please take care not to scold your finger!
- Once the yeast is activated and frothy, add to the flour and salt, and mix well and form into a single ball of dough. You want a loose dough, not too dry but not too wet, add a little warm water or a sprinkle of flour as required. Hold the bowl with one hand and mix with the other, that way you will have a clean hand to add more flour if a little wet or more water if to the dough is to dry.
- Kneed your dough, stretching it out and getting the glutens to develop and make an elastic dough.
- Oil your baking pan (the tiffin tin), I like to use a little olive oil, and put the dough in the tin. Place a few green sticks (or stones) in the bottom of the oven billy can and place the tiffin tin inside. Place the lid on and then put near the fire to warm and prove the dough. Ideally you want it to double in size. Depending on the weather conditions and temperature of your fire this is likely to take 20-30 minutes.
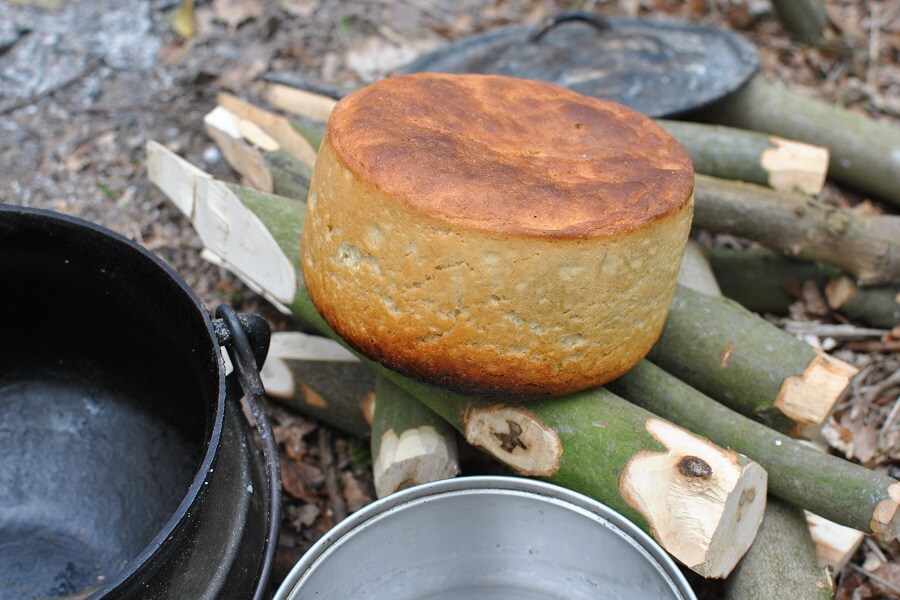
- When the dough has proved sufficiently (half again / doubled in size), scrape back the embers of the fire and place the oven in the middle and push the embers back up against it. Baking typically takes 20-30 minutes; check after 10-15 minutes and if it looks like a loaf with a nice raised dome, replace the lid and cover with hot embers to finish baking.
- To judge if the loaf is cooked through, use a thin pointed stick as a skewer and push it through the top of the loaf. It should go through with little resistance and come out clean. If it does, turn out the loaf and tap the bottom, it should sound hollow.
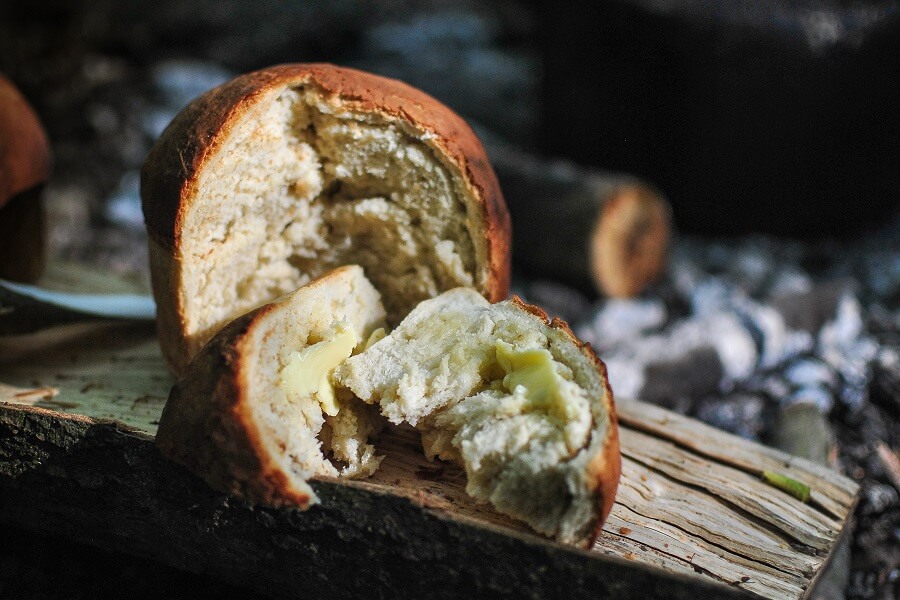
- Once you are happy with the basic recipe, experiment with a few additions, make a cracked black pepper and cheddar cheese version (simple chop up some cheese and add plenty of black pepper). Or how about a pesto bread, just add some to the dough, or make a hedgerow version with herbs from the hedge or if still around some wild garlic. If adding dry ingredients, then you may need a little more water to keep the dough loose. If adding wet ingredients such as berries or currants, then take care to reduce the liquid added otherwise you will end up with a very wet and sticky dough – but if you do just add a little more flour.
Recipe – Bannock / Dampers / Ashcakes
As much as I love making bread, if you are pushed for time and hungry then a bannock is just the answer, it’s quick and easy to make.
- Measure out ½ mug of good quality, strong bread baking flour (350ml mug), ¾ teaspoon of baking powder, 2-3 dessert spoons of milk powder, 1 teaspoon of sugar, I like to use muscovado, a brown sugar to add flavour and if you want a more cake like bannock a dessert spoon of whole egg powder.
- Mix all these together with sufficient water, warm if you like, to create a slightly sticky but firm dough.
- Prepare a stick ready for cooking the bannock, use green wood to reduce the chances of it burning. Trim the bark back to avoid imparting any bitterness to the bread – be careful what specifies you choose, a hazel, sycamore, ash or oak stick should be fine. Use a long stick, so you don’t have to be quite so close to the fire and avoid the smoke.
- To cook the bannock, roll the dough out into a long sausage and wrap around the stick. Leave room between the twists around the stick to allow it to rise and cook. It should resemble a helter-skelter, with room for an imaginary marble to roll down! Squash down the ends onto the stick so it doesn’t fall off into the fire.
- Cook over the embers until golden brown all over. It should be firm to touch but still have some spring to it. Carefully slide off the stick and eat while warm. When you twist the cooked dough on the stick, it should come away clean rather than be doughy – if it is not bake for a little longer!
- Alternatively, rather than use a stick, cook in a heated and oiled cast iron skillet. Press the bannock dough down into the pan so that it is thumb thick. Prop up the skillet near the embers to cook in the radiated heat, turn as and when necessary to cook evenly all over. When the first side is done, turn and repeat. Tradition has it that bannock should be broken, so please don’t cut your bannock.
- Another option is to cook directly in the fire – to do this make small, thinner patties, and place them directly on white hot ashes! It’s a good idea to have made something to move and flip the patties, perhaps a long handles spatula or set of tongs. Obviously, there is far greater chance of your bread burning, but with care, you can achieve good results, though some practice is required to avoid burnt bannock!
Recipe – Flatbread
- Unlike the leavened breads above, a flatbread as the name suggests, doesn’t have any raising agent. Obviously, they need to be flat and this means thin too. So before making, it would be good to make a rolling pin or something long and round to roll out your dough.
- The basics of a flatbread are flour, some fat, a few herbs and a little water. A half cup of bread flour will make 4 flatbreads, add the herbs, some butter or olive oil and a little water and mix into a firm dough.
- Divide into 4 balls and roll out into thin round disks – use flour on the rolling pin and whatever you are rolling them on, a long top perhaps to avoid them sticking.
- Cook them in a hot and well-oiled pan, flipping occasionally until done. They are best eaten while hot or warm.
- Alternatively, if you don’t have a pan for cooking, place them directly on white hot ashes to cook.
Join David for his Campfire Bread Baking course – click here!