
What is a rocket stove? It’s a hollowed out log with a fire inside, that has a hole in the side to direct the breeze which fans the fire, and hence it burns like a rocket!
There are a few ways to make a rocket stove, you can cut a log and drill holes into it, make one from a bundle of sticks, and this version where we split a log and do some sawing and chopping.
It’s a lot like the Swedish Fire Log, a log split or cut, then set on fire in the gaps between the segments of the log. However, this version, the rocket stove, will burn hotter, because of the airflow directed into the heart of the fire through the hole at the bottom of the log!
Things you’ll need – a log, an axe and knockometer (a log) or mallet, a small hand saw, string or perhaps some wire, a tinder bundle, a few thin sticks and something to ignite the rocket stove!

The log
In this example, I’m using a seasoned larch log. I find that larch burns brightly, creates good embers and lasts a while, more typical of a hardwood, although perhaps arguably a soft wood., so it sits in the middle. Anyway, that log, I’ve chosen one that is approximately 350mm tall and 150mm diameter. This worked well, but you can just as easily use one that is taller or wider, but you will need to be able to spilt it!
Other woods that will work well include pine and spruce – just as with larch they need to be reasonably well seasoned, dried out. If once you split the log you find it’s a bit damp, well just leave it a while, store it somewhere a gentle breeze will dry it out, probably best under some cover. In fact while you’re there, you may as well split a few more for your campfire!
Splitting, cutting and chopping
Split the log into four pieces length ways, all with reasonably equal segments. By all means experiment with more pieces, especially on larger logs.
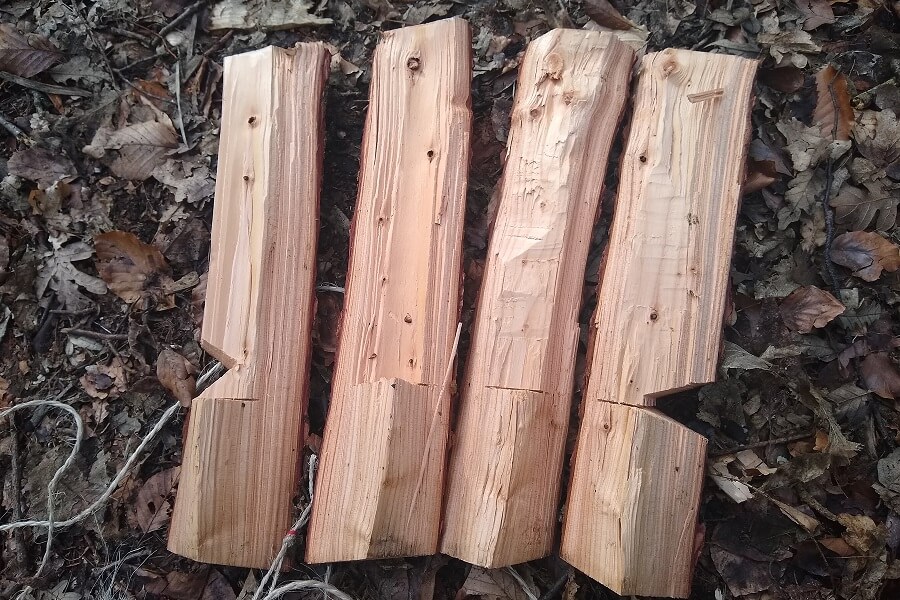
To do this I place the axe on top of the log, hold the handle with my non-dominant hand and drive the axe bit into the log, by hitting it with the knockometer (a heavy log or mallet) held in my dominant hand. Be safe, ensure that if the axe swings away from the log it isn’t going in your direction! I usually hold the axe so that is goes from left to right in front of me, so that when it swings after being hit, it will go to the left (I’m right handed). Alternatively the other way around if left handed. Yes, you could just swing the axe and split the wood as you might do for chopping firewood.
The next stage is to hollow the log – but not all the way down the length of the log. Approximately 100mm up from what will be the bottom of the rocket stove, use your saw to cut across the centre section of each piece (see photos above). Then use your axe to split the wood from the middle of the logs, all the way down to the stop cut you have just made, using a similar approach to above.
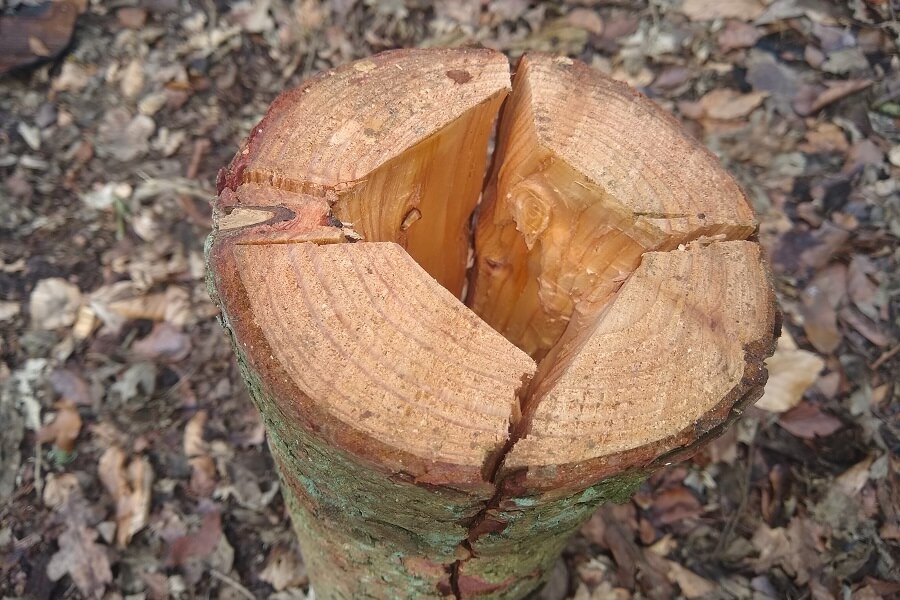
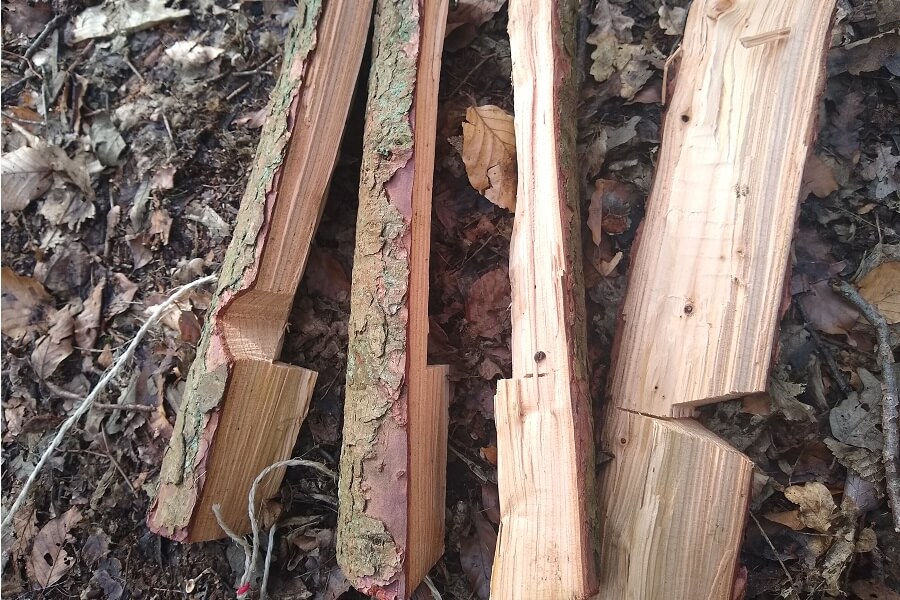
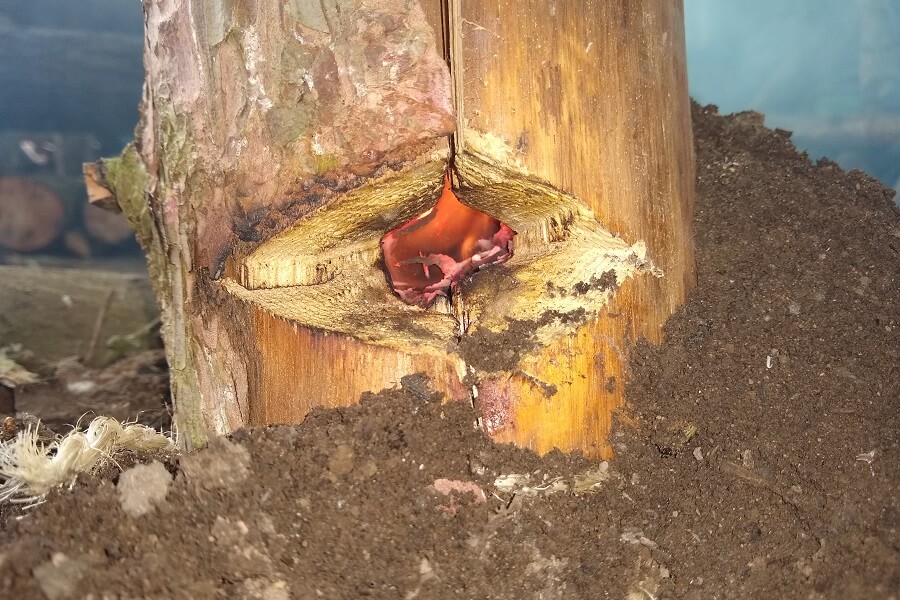
Line up the logs, holding them together (as above photo) and then cut out a v-shaped hole on two adjoining pieces down by the stop cut. This will be the place you ignite the fire, the ignition hole, and the breeze will fan the fire through this hole. Reassemble to see the ignition hole, is it big enough, you may need to cut a little more out to make it easy to light the tinder bundle!
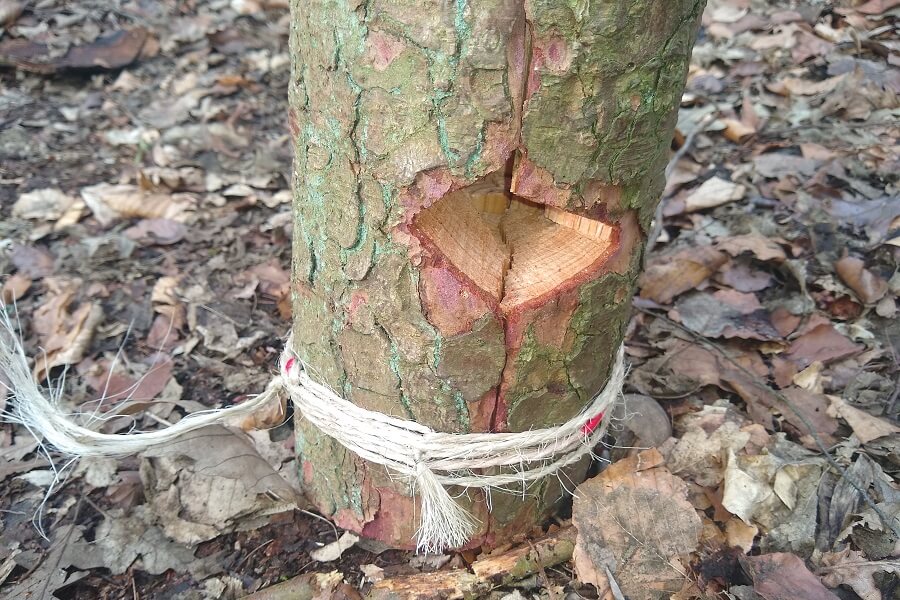
With the pieces assembled, tie it together with some sting. Yes, I know, it’s string, it will eventually burn through – but tying the sting at the bottom and burying it a little into the soil will avoid this. Alternatively, perhaps use a piece of wire to secure it. So, it should look something like the photo above – a hollowed out log, but not all the way to the bottom, and an ignition hole going into the side of the log.
Igniting the rocket stove
Gather some tinder, perhaps some shredded birch bark, dried plant fibres, or maybe cotton wool and petroleum jelly. Place your tinder into the base of the rocket stove, place the stove so that the breeze will blow into the hole and up the centre of the log. And, it’s a good idea to bury the bottom of the rocket stove into some soil, avoiding the string burning! Now, set it alight, a long match works well.
The teenage students, found this a little frustrating at first, they were using fire steels to drop sparks onto the tinder, but mainly because they didn’t have sufficient air flow through the hole and into the main hollowed out chamber. So, do try to make sure the flames can travel through to the centre, have a bit of space for the air and flames to blow through.
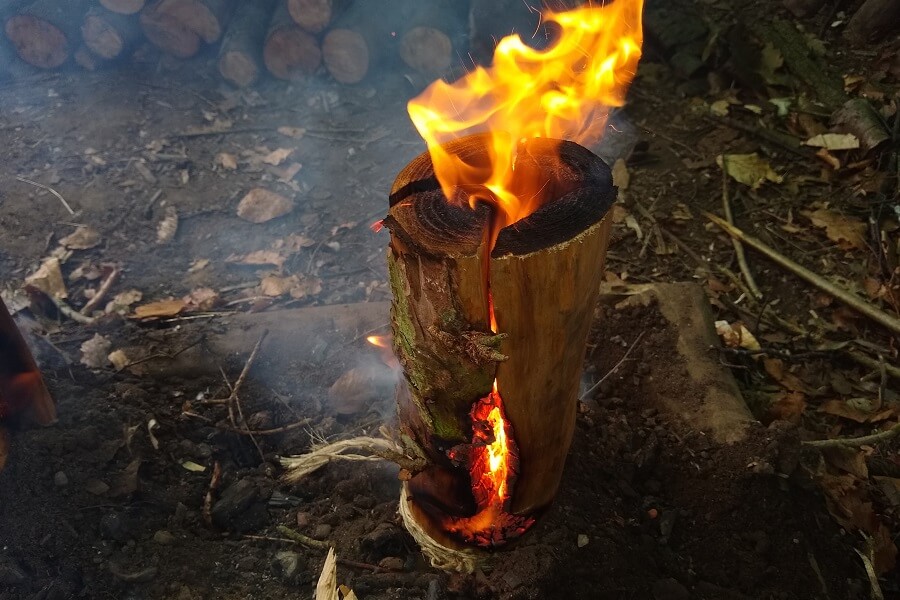
Some perseverance may be required to set light to your tinder and get the stove burning, just like my students did. Once it’s going, drop a few, dry, thin, snappy sticks into the top of the stove and with a steady breeze your rocket stove should burn brightly. Don’t peer to closely into the top, those flames can suddenly come shooting out!
Time to enjoy your rocket stove, and if it’s securely pushed into he ground, and the flames are strong, you could boil water in a small kettle of pot, by sitting them on the top of the stove.
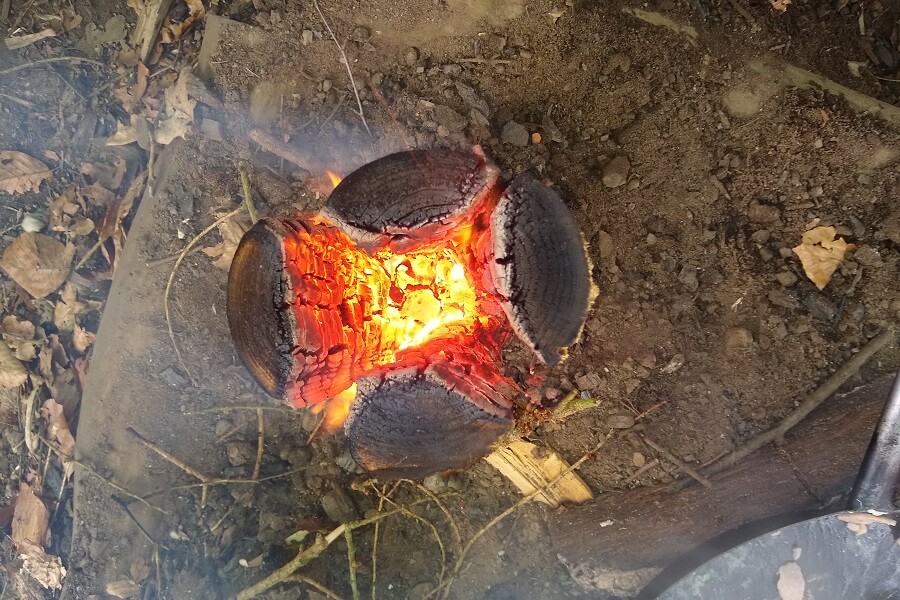
The rocket stove will burn from the inside, adding a few sticks will help keep it burning brightly, but eventually it will fade to embers. I do love the embers of larch they glow a beautiful bright red.
The students thoroughly enjoyed making their rocket stoves, I hope you do too. Any questions, then buy all mean get in touch, either comment below or via email at the bottom of the page or contact form in the menu above.