Have you ever injured your dominant hand badly enough that you had to learn how to use your other hand? I have been unfortunate enough to do this not once but twice, although the second was a shoulder injury, it still meant I couldn’t use my dominant hand. Seeking the positive, there was a benefit to me, in that I am now able to demonstrate carving techniques using either my left or dominant right hand. Being ambidextrous also helps those who are left-handed, because I can show them how to carve the way they would prefer, which means they don’t have to transpose the movements.
If you haven’t had such bad luck, well that’s great news and I hope it stays that way. But ponder for a moment how you would whittle a stick if you could only use one hand. There are many people in this position and not wanting to exclude anyone from my courses, I recently helped someone enjoy a day of Bushcraft who had initially rejected the idea because of his life-long injury.
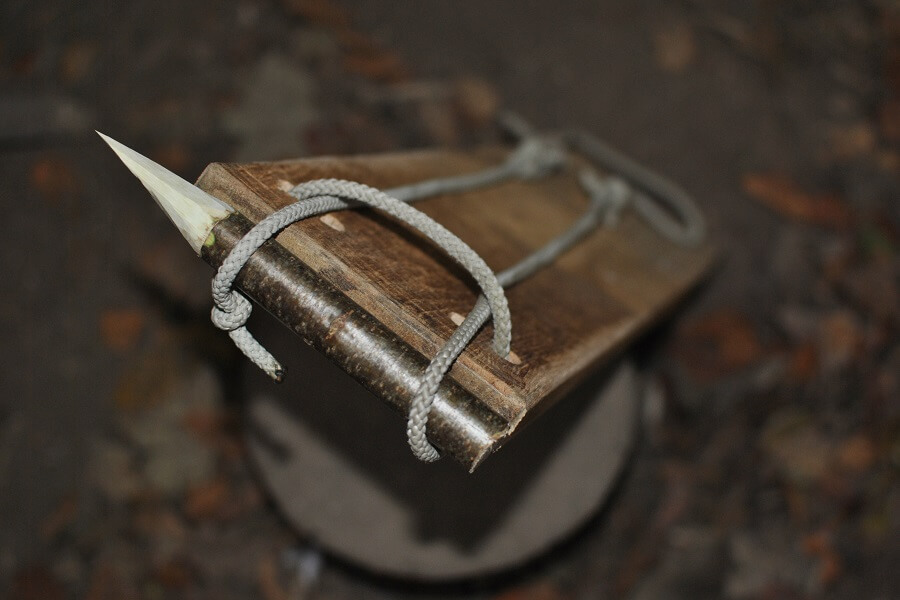
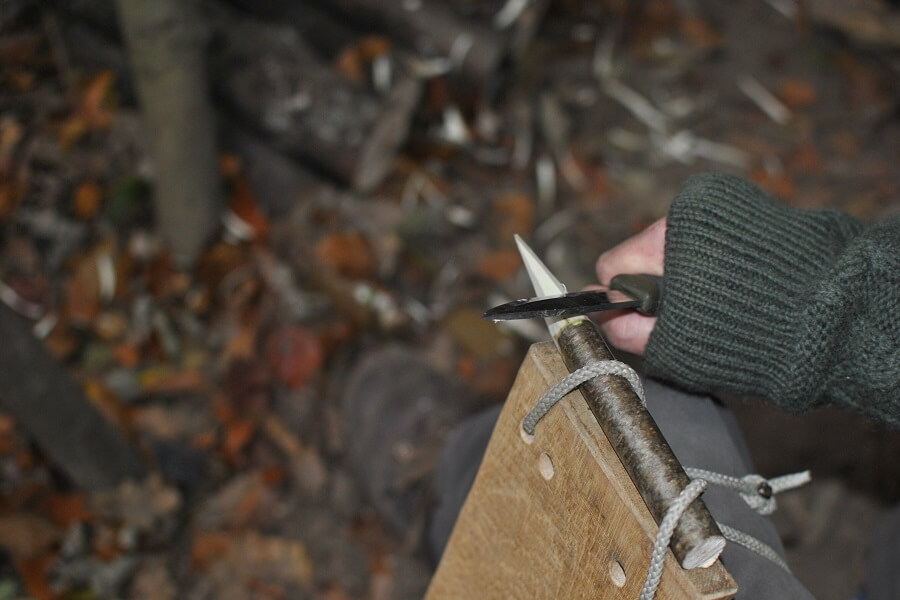
So how do you carve a stick or whittle a spoon if you can’t hold it with one hand while carving with the other? Clearly you need something to hold it firmly, but in such a way that it is easy to adjust the piece of wood. I had a chat with my friend Jon Mac at Spoon Carving First Steps and he suggested a wooden board with a couple of holes drilled and a piece of rope passed through (see pictures). The idea is to clamp the piece of wood / stick in place with the rope by holding the rope tight using your foot. He had heard of this idea but not seen it in action – so it was time to try it out!

Making the board – cut a piece of wooden plank, long enough to be slightly taller that the height of your knee from the ground when sitting (my example was 600mm and 150mm wide). Drill a couple of holes to pass a rope through – tie the ends together and dangle them over the top, so it hangs down.
Using the board – lean the wooden board against your leg and put the heal of your foot (other leg) through the loop that dangles down. Place the stick under the loop and then apply pressure with your foot to hold it in place. To adjust the position of the stick, reduce the pressure and more the wood, then reapply pressure!
It took a few goes to be comfortable with it, trying out different positions to see which worked best. But as you can see, I whittled a piece of hazel stick successfully. Happy with the aid to one-handed whittling, it was now just a matter of seeing how my budding student got on with this aid. Well the great news is that it worked a treat. He tried different ways of using it and quickly found a position which meant he could whittle sticks successfully and carve one quicker than other attendees who had both hands available to them. This is what he had to say afterwards:
I was quite gobsmacked as to the best of my recollection no one has ever made such a concerted effort to adapt to my needs before, and to support my inclusion
Thank you to Jon Mac at Spoon Carving First Steps (please do take a look at his website to see his beautiful photography and wonderfully carved spoons and kuksa / wooden cups!
