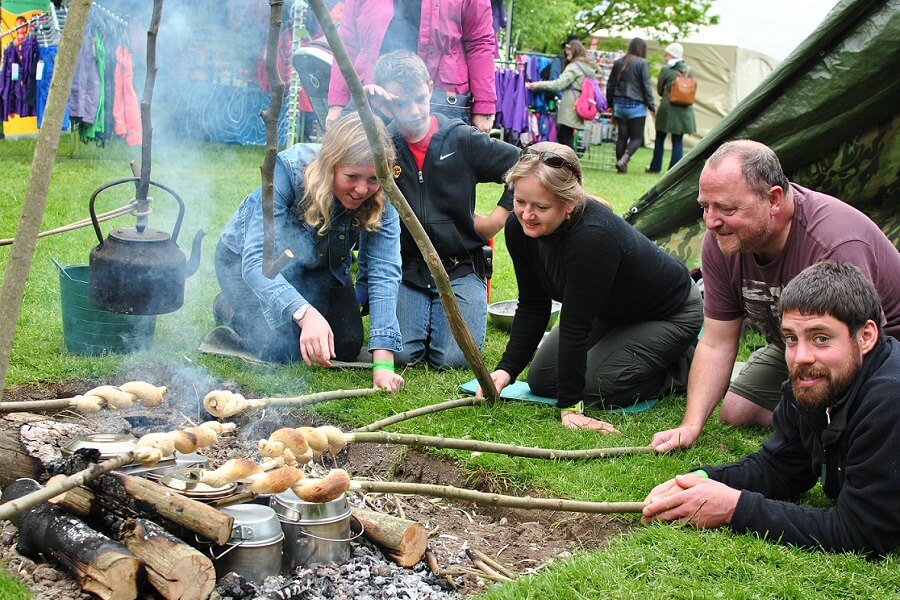
Wow, what a fantastic weekend at The Bushcraft Show. My bread baking workshops were booked up quickly, with individuals, couples and families all wanting to bake bread and make bannock on a campfire. There was a lovely friendly atmosphere throughout, with people helping each other, commenting on their own experiences and asking questions, not just those in the workshops but many of those watching too. The bread baking workshop started with making a yeast based bread and then while this bread was proving and then baking, we made, cooked and enjoyed eating bannock!
The campfire
When cooking on a campfire, it is important to recognise that no matter how good your fire, the embers will cool. If you are just boiling a kettle that may be fine, but if baking bread, you will need a sustained heat source; a good supply of embers to maintain the required baking temperature.
One way of making sure you have sufficient embers is to have a long-fire, perhaps double the width you may actually need for cooking. One half should be used for cooking while the other is used to maintain a fire and create new embers. As the embers you are cooking over cool, you can then rake fresh hot embers into your cooking area.

Pots and pans
With the exception of baking bread directly in the embers, you are going to need a pot to cook the bread. Options include a Dutch oven or some combination of billy cans to form an improvised oven.
The benefit of a Dutch oven, it being made of cast iron, is that it is good at distributing heat evenly around the pot. But, if you place a Dutch oven directly over flames, the bottom will still get hotter than the sides and will likely burn what you are cooking inside.
To avoid this when baking with a Dutch oven, you can cook your bread in another pot inside the Dutch oven. This creates an oven, similar to what you would find in a kitchen. Items cooked in an oven are usually cooked in the middle of the oven, supported on a rack. In the Dutch oven the pot containing the food to be cooked or in this case the dough to be baked is supported on green wood pieces or stones.

The Dutch oven is a very useful item in a fixed, semi-permanent camp or perhaps on a canoeing journey, but if hiking it’s weight would be far to much to carry. An alternative, lighter option is to carry two pots or billy cans, one sitting inside the other as the Dutch oven above. Lightweight aluminium pots are an option, but you may find they tend to deform easily with the heat of the fire. My preference is for stainless steel billy cans.
Bread recipe

This recipe produces a lovely small loaf with a nice dome. I cook this one in an improvised oven; a Zebra stainless billy can with another smaller can inside, a tier from a Zebra stainless tiffin food carrier.
- Measure out 1 mug of good quality bread baking flour (350ml mug) and ½ teaspoon of salt and put in a mixing bowl, ideally warm the bowl first.
- Activate the yeast, I use Allinson dried active yeast; Add 1 teaspoon of sugar, a pinch of flour and 1½ teaspoons of dried active yeast to a ⅓ of a mug of warm / hot water, mix well and leave to activate – bubble and froth for a few minutes. I find the best way to judge the temperature is to carefully put a finger in the water, it should feel hot, but not so much as you need to remove your finger – please take care not to scold your finger!
- Once the yeast is activated and frothy, add to the flour and salt, and mix well and form into a single ball of dough. You want a loose dough, not too dry but not too wet, add a little warm water or a sprinkle of flour as required.
- Kneed your dough, stretching it out and getting the glutens to develop and make an elastic dough.
- Oil your baking pan (the tiffin tin), I like to use a little olive oil, and put the dough in the tin. Place a few green sticks (or stones) in the bottom of the oven billy can and place the tiffin tin inside. Place the lid on and then put near the fire to warm and prove the dough. Ideally you want it to double in size. Depending on the weather conditions and temperature of your fire this is likely to take 20-30 minutes.
- One the dough has proved sufficiently, scrape back the embers of the fire and place the billy can in the middle and push the embers back up against it. Baking typically takes 30-40 minutes; check after 20 minutes and if it looks like a loaf with a nice raised dome, replace the lid and cover with hot embers to finish baking.
- To judge if the loaf is cooked through, use a thin pointed stick as a skewer and push it through the top of the loaf. It should go though with little resistance and come out clean. If it does, turn out the loaf and tap the bottom, it should sound hollow.
Bannock recipe
As much as I love making bread, if you are pushed for time and hungry then a bannock is just the answer, it’s really quick and easy to make.
- Measure out ½ mug of good quality bread baking flour (350ml mug), ¾ teaspoon of baking powder, 2-3 dessert spoons of milk powder, 1 teaspoon of sugar, I like to use muscavado, a brown sugar to add flavour and if you want a more cake like bannock a dessert spoon of whole egg powder.
- Mix all these together with sufficient water, warm if you like, to create a slightly sticky dough.
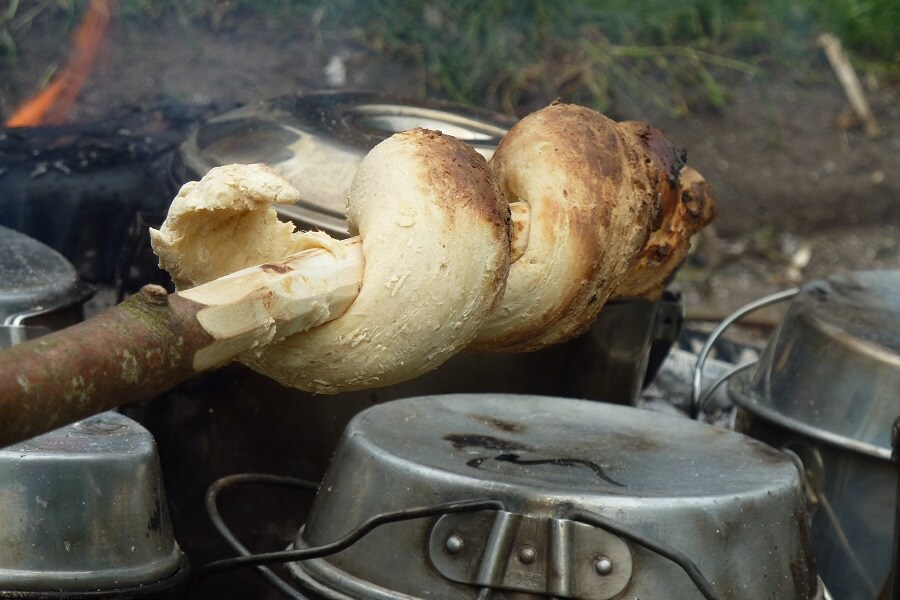
- Prepare a stick ready for cooking the bannock, use green wood to reduce the chances of it burning. Trim the bark back to avoid imparting any bitterness to the bread – be careful what wood you choose, a hazel, sycamore, ash or oak stick should be fine. Use a long stick, so you don’t have to be quite so close to the fire and avoid the smoke.
- To cook the bannock, roll the dough out into a long sausage and wrap around the stick. Leave room between the twists around the stick to allow it to rise and cook. It should resemble a helter-skelter, with room for an imaginary marble to roll down! Squash down the ends onto the stick so it doesn’t fall off into the fire.
- Cook over the embers until golden brown all over. It should be firm to touch but still have some spring to it. Carefully slide off the stick and eat while warm.
- Alternatively, rather than use a stick, cook in a heated and oiled cast iron skillet. Press the bannock dough down into the pan so that it is thumb thick. Prop up the skillet near the embers to cook in the radiated heat, turn as and when necessary to cook evenly all over. When the first side is done, turn and repeat. Tradition has it that bannock should be broken, so please don’t cut your bannock.
Thank you to everyone who joined the bread baking workshops at The Bushcraft Show, I hope you enjoy these recipes as much as I do. Don’t forget your homework, there is more bread to be baked!